

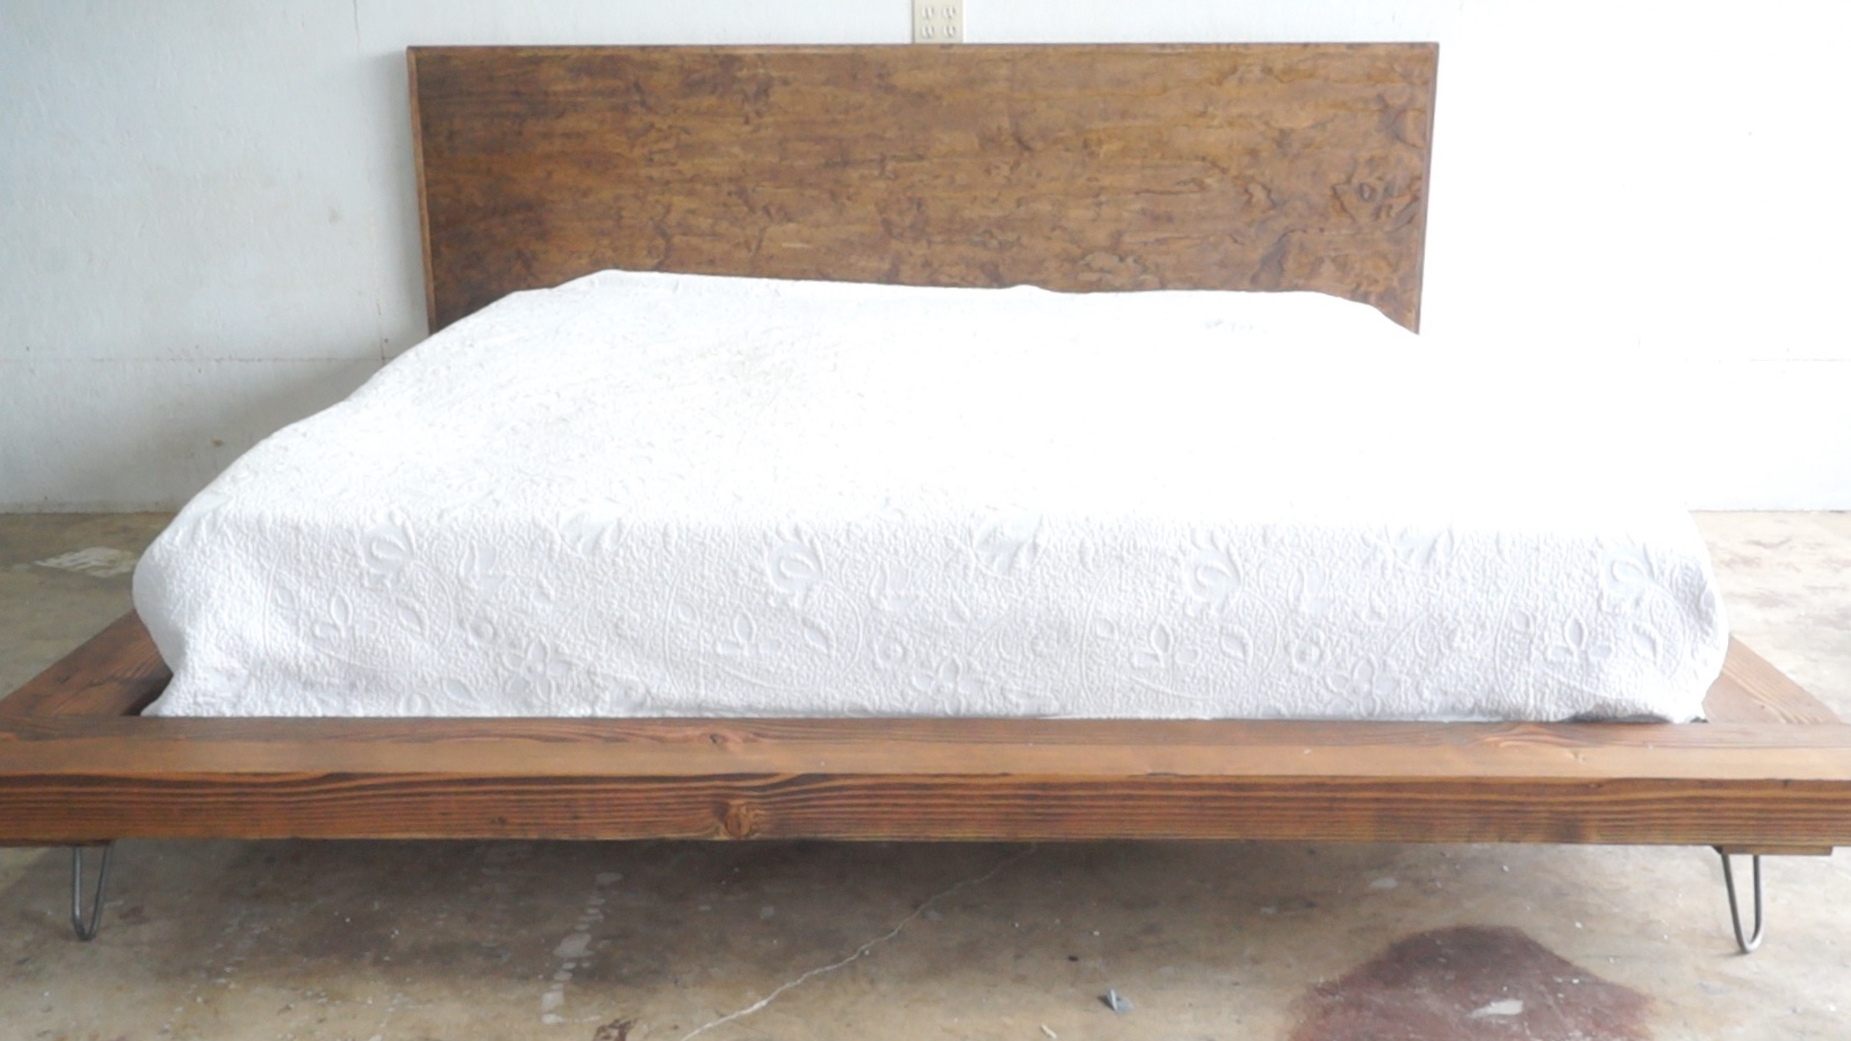
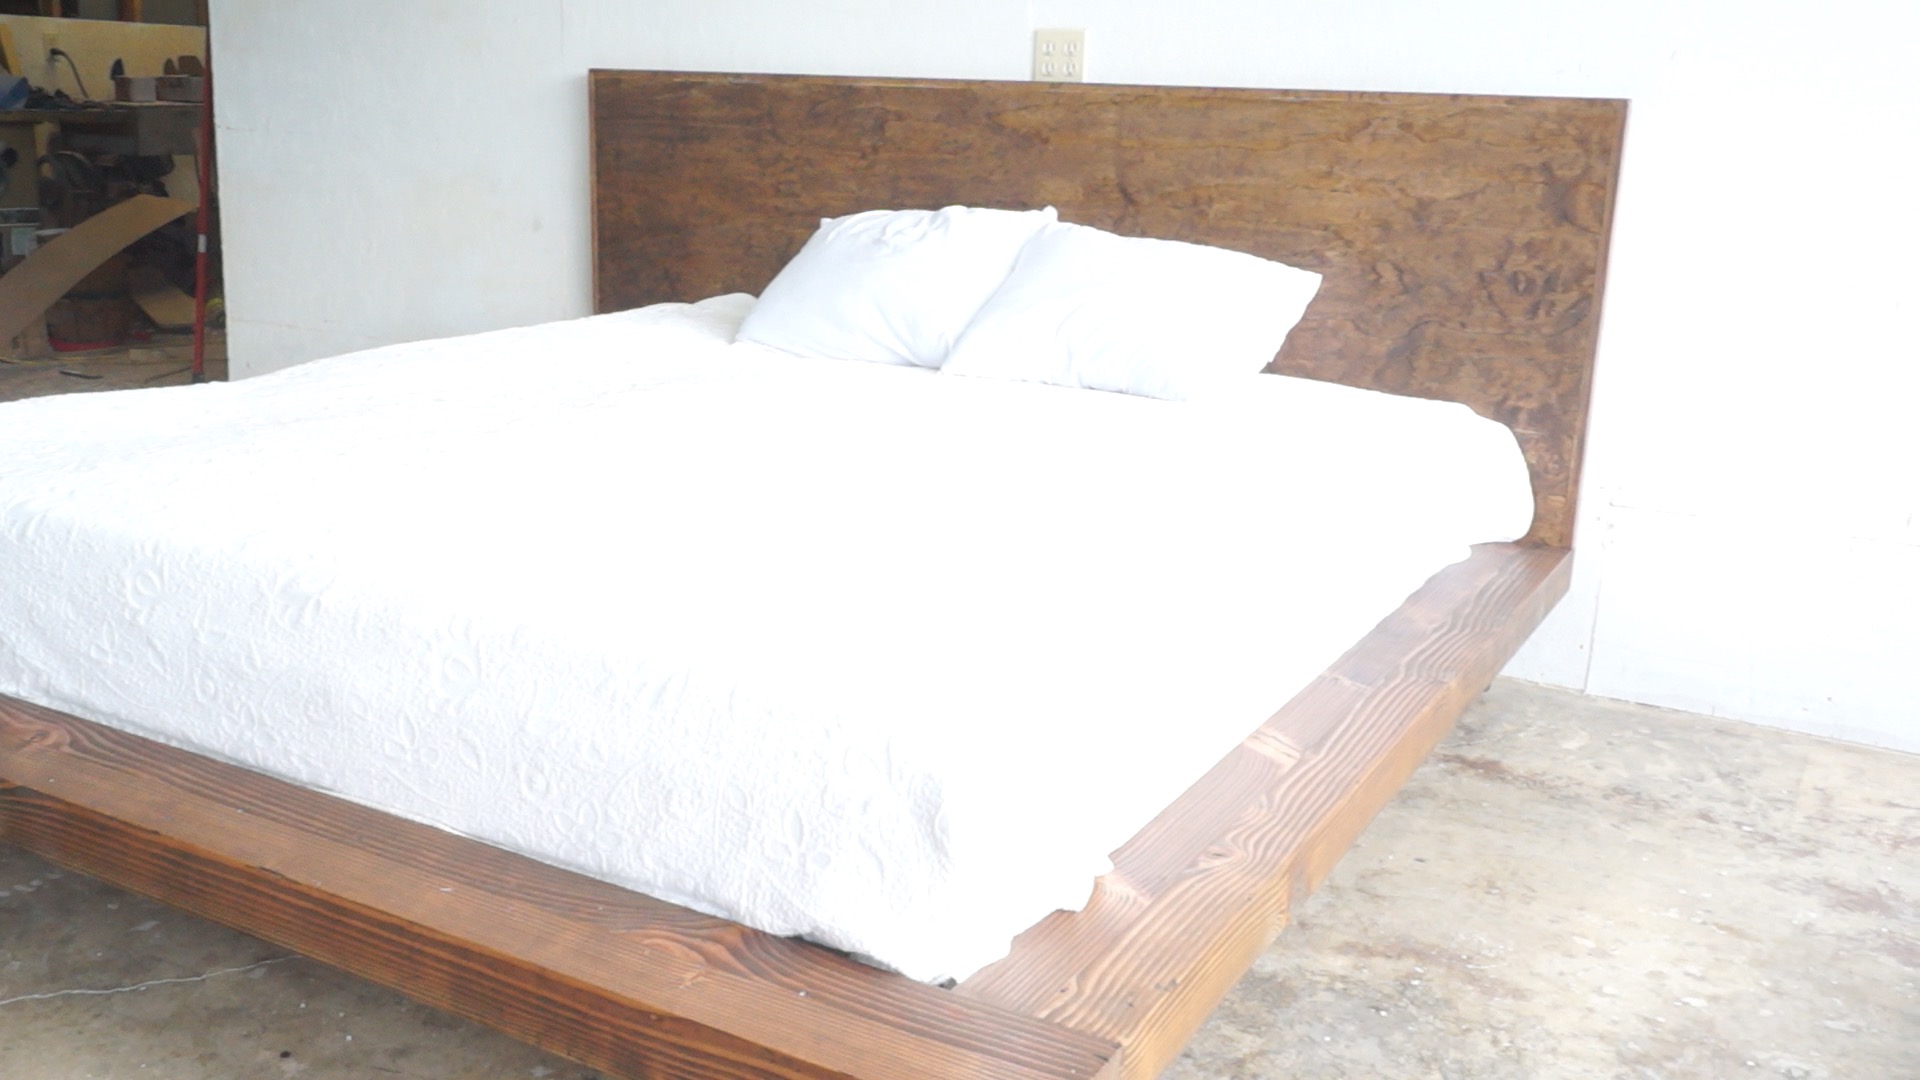
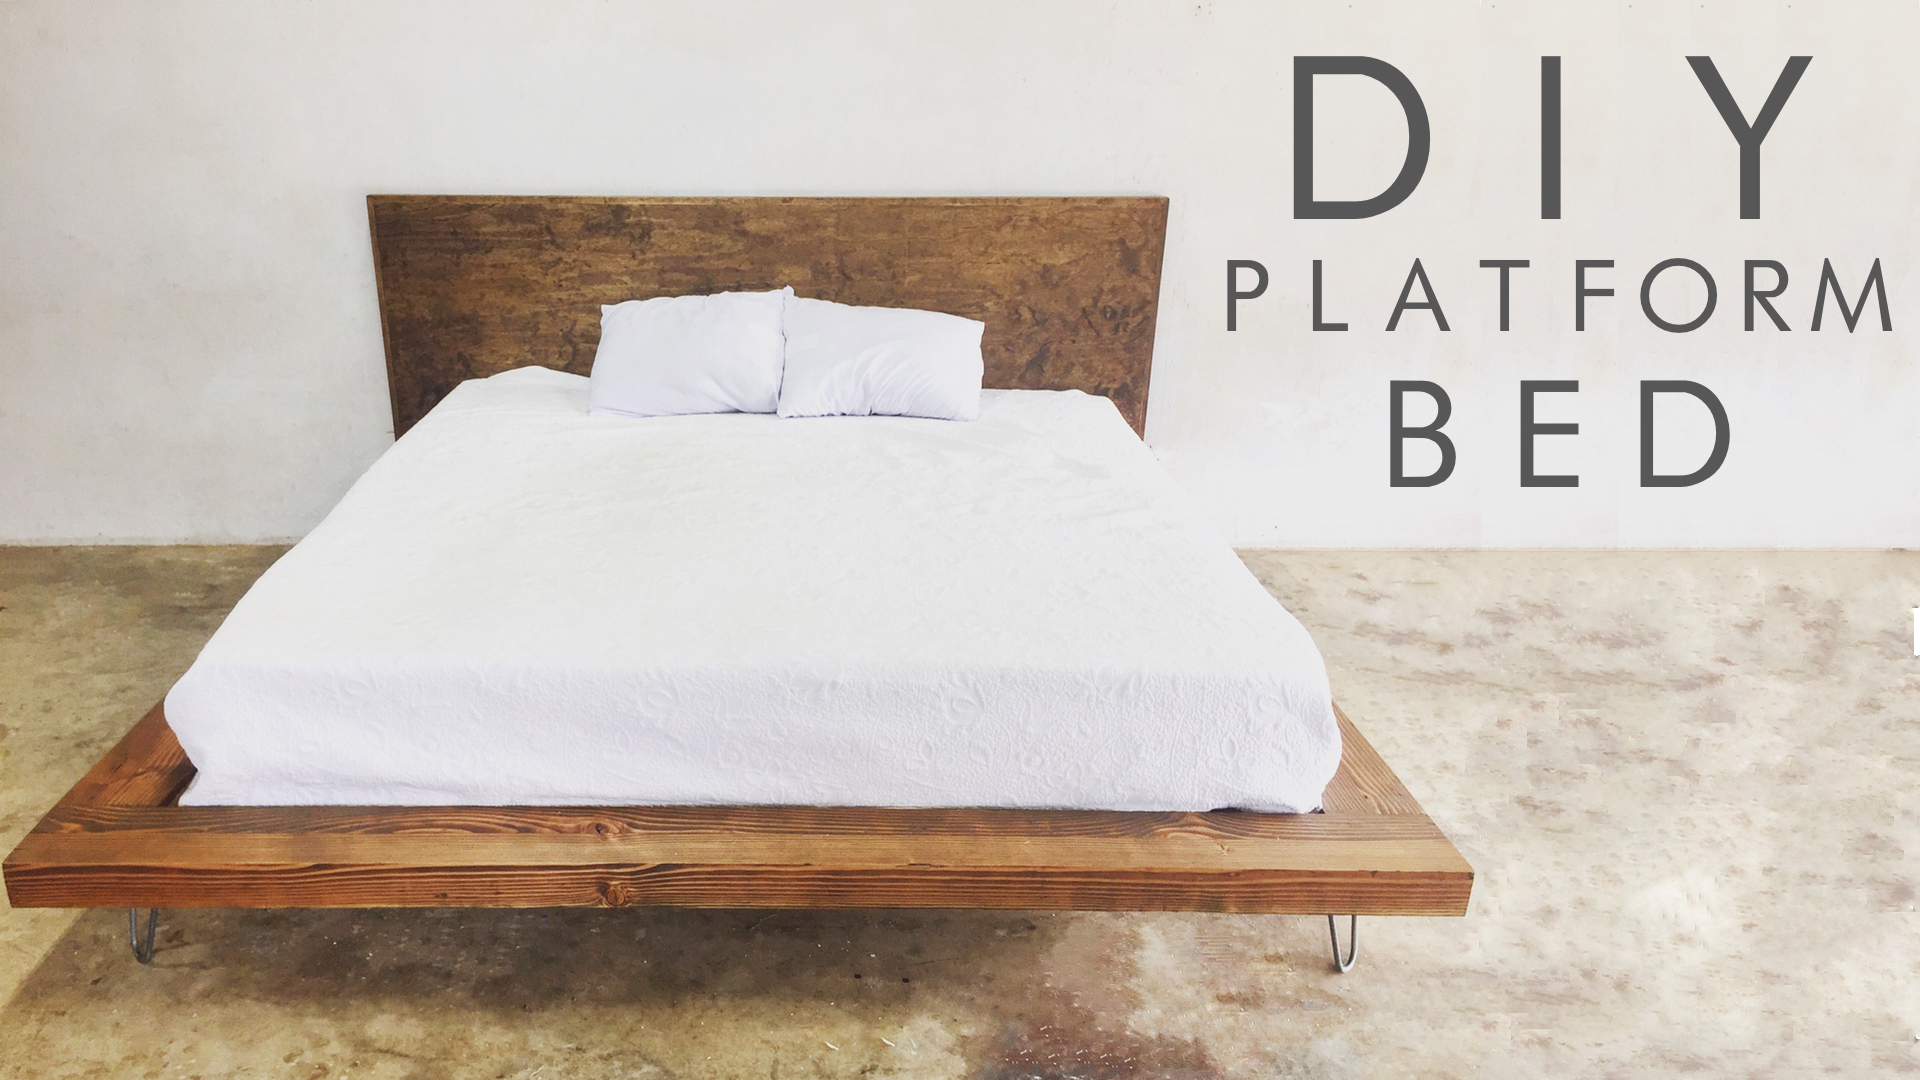
EP. 48 DIY MODERN PLATFORM BED
Today I'm building a king size Mid-Century/Japanese inspired modern platform bed. If you plan to build this for a different size mattress, simply subtract or add the difference in mattress size on the bed. This was a really fun build and a design I wanted to build for a while, so I was really excited to build this one!
https://www.industrialbydesignco.com/
MATERIALS AND SUPPLIES:
6" Raw Steel Hairpin Legs: http://amzn.to/2eEjnNP
7 - 8' 4x4's
12 - 8' 2x4's
2 - 8' Select Pine 1x2's
1 - 3/4" Pine Plywood
4 - 8' 1x4's
2 - 4'x8' Tempered Hardboard Panels (for platform)
Dark Walnut Danish Oil: http://amzn.to/2euC7Mj
Wood Glue: http://amzn.to/2fr7rO5
Kreg Jig K4: http://amzn.to/2fr0X1z
2.5" Kreg Jig Screws: http://amzn.to/2eEf7O1
Doweling Jig: http://goo.gl/xgrQyE
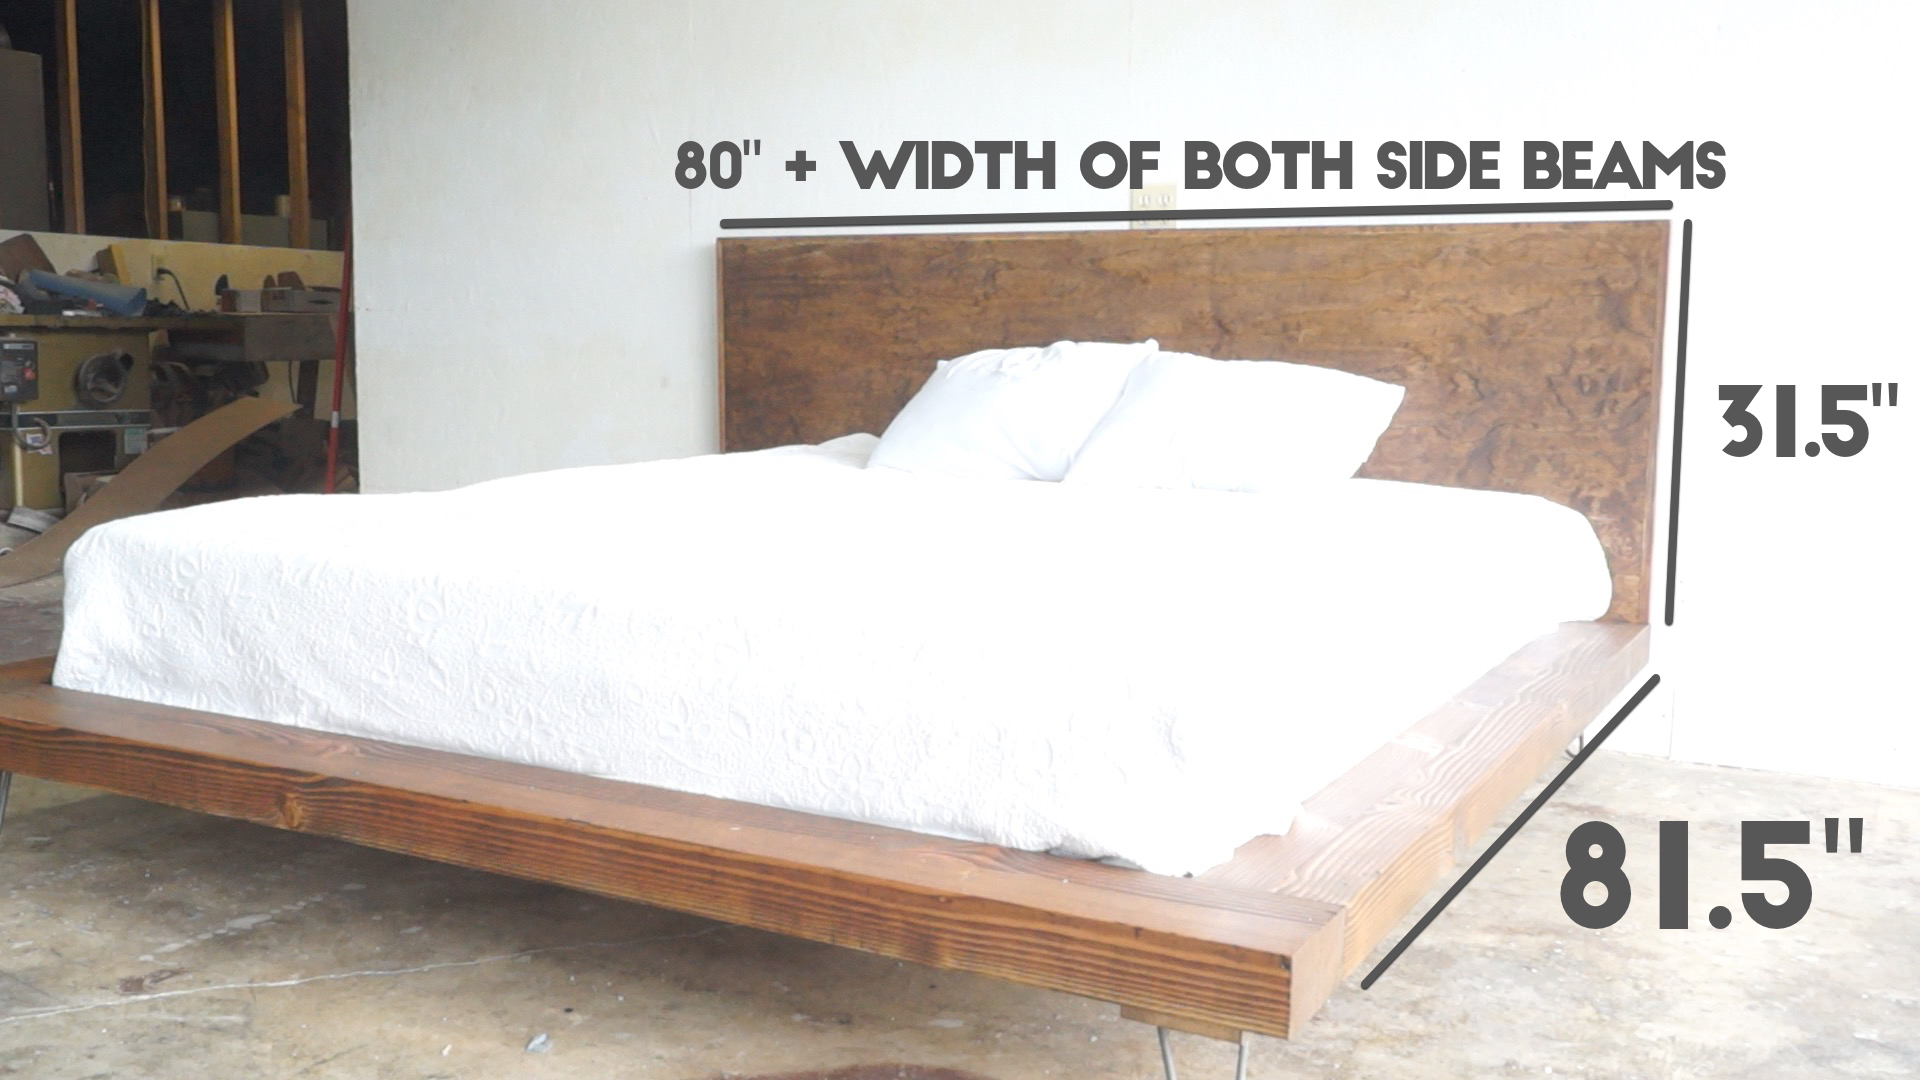
Measurements are for a king size bed.

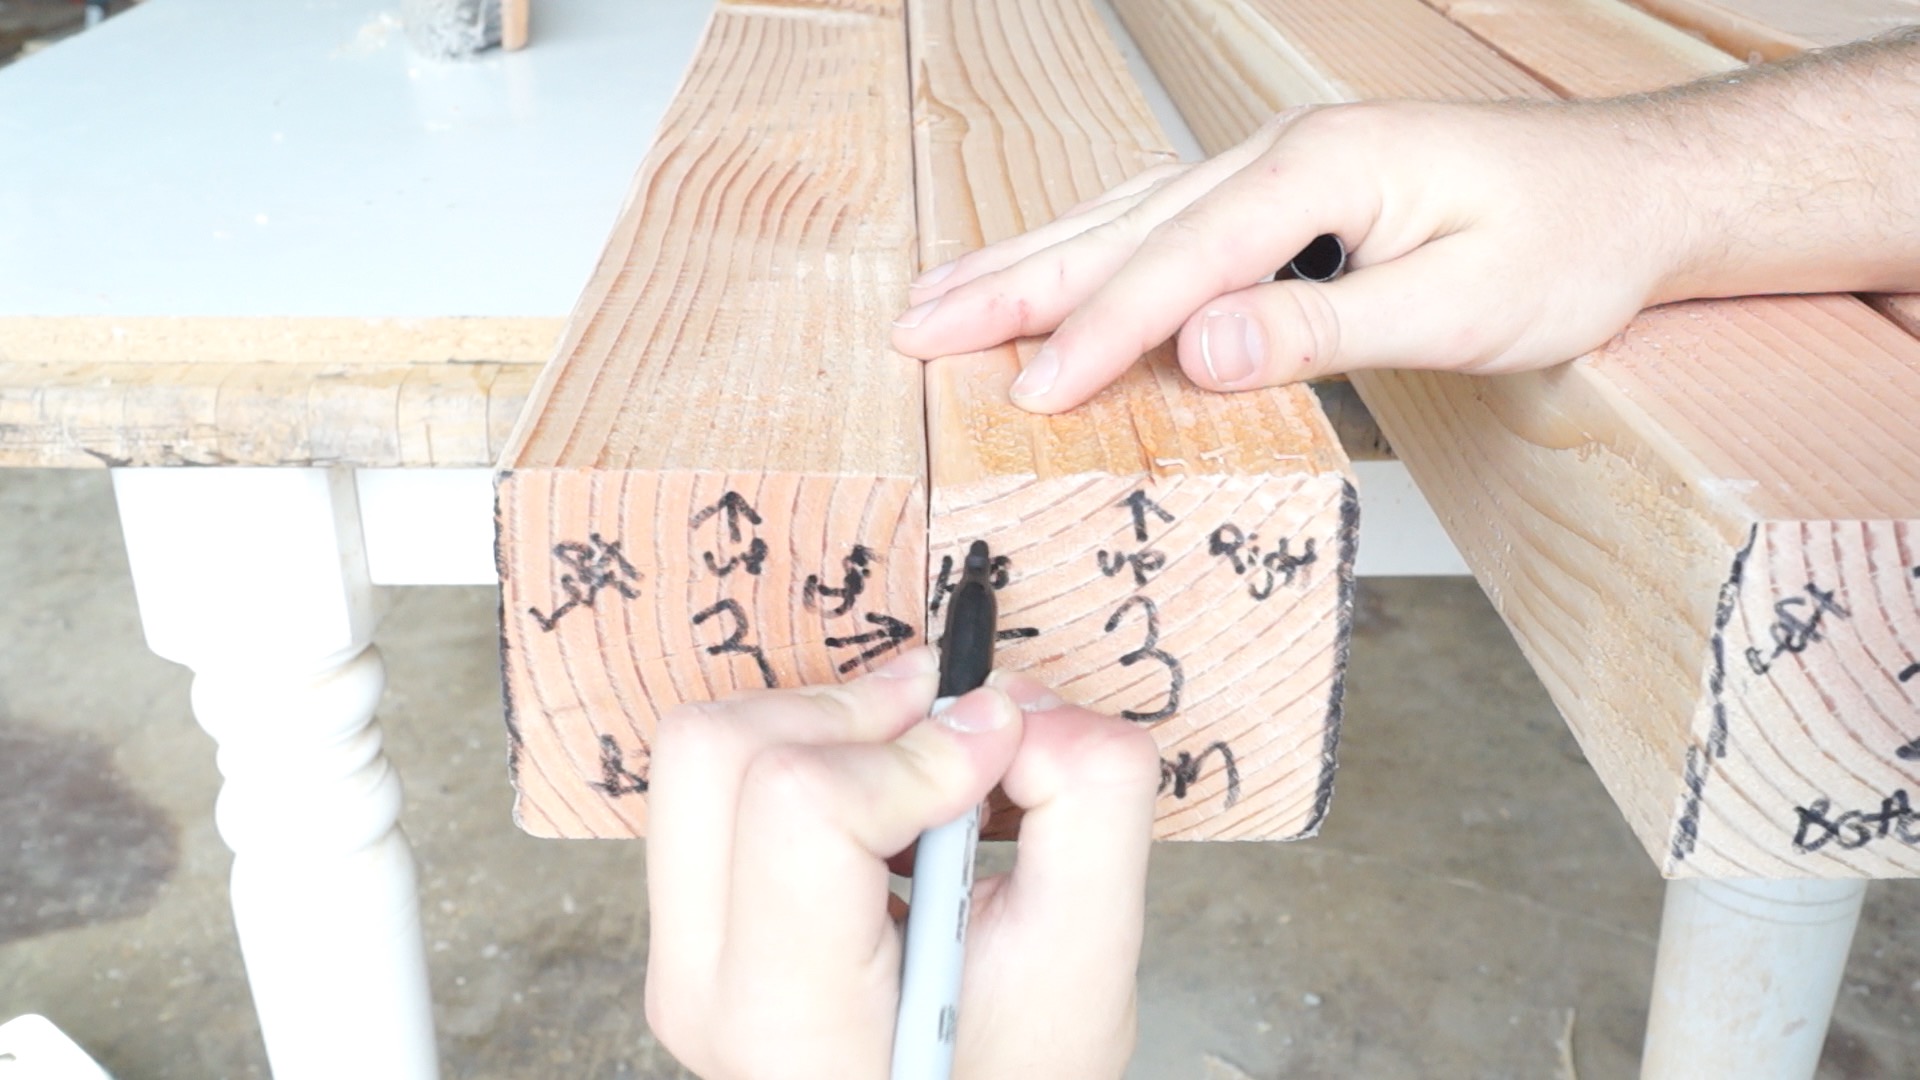
STEP ONE: MATCH THE BEAMS
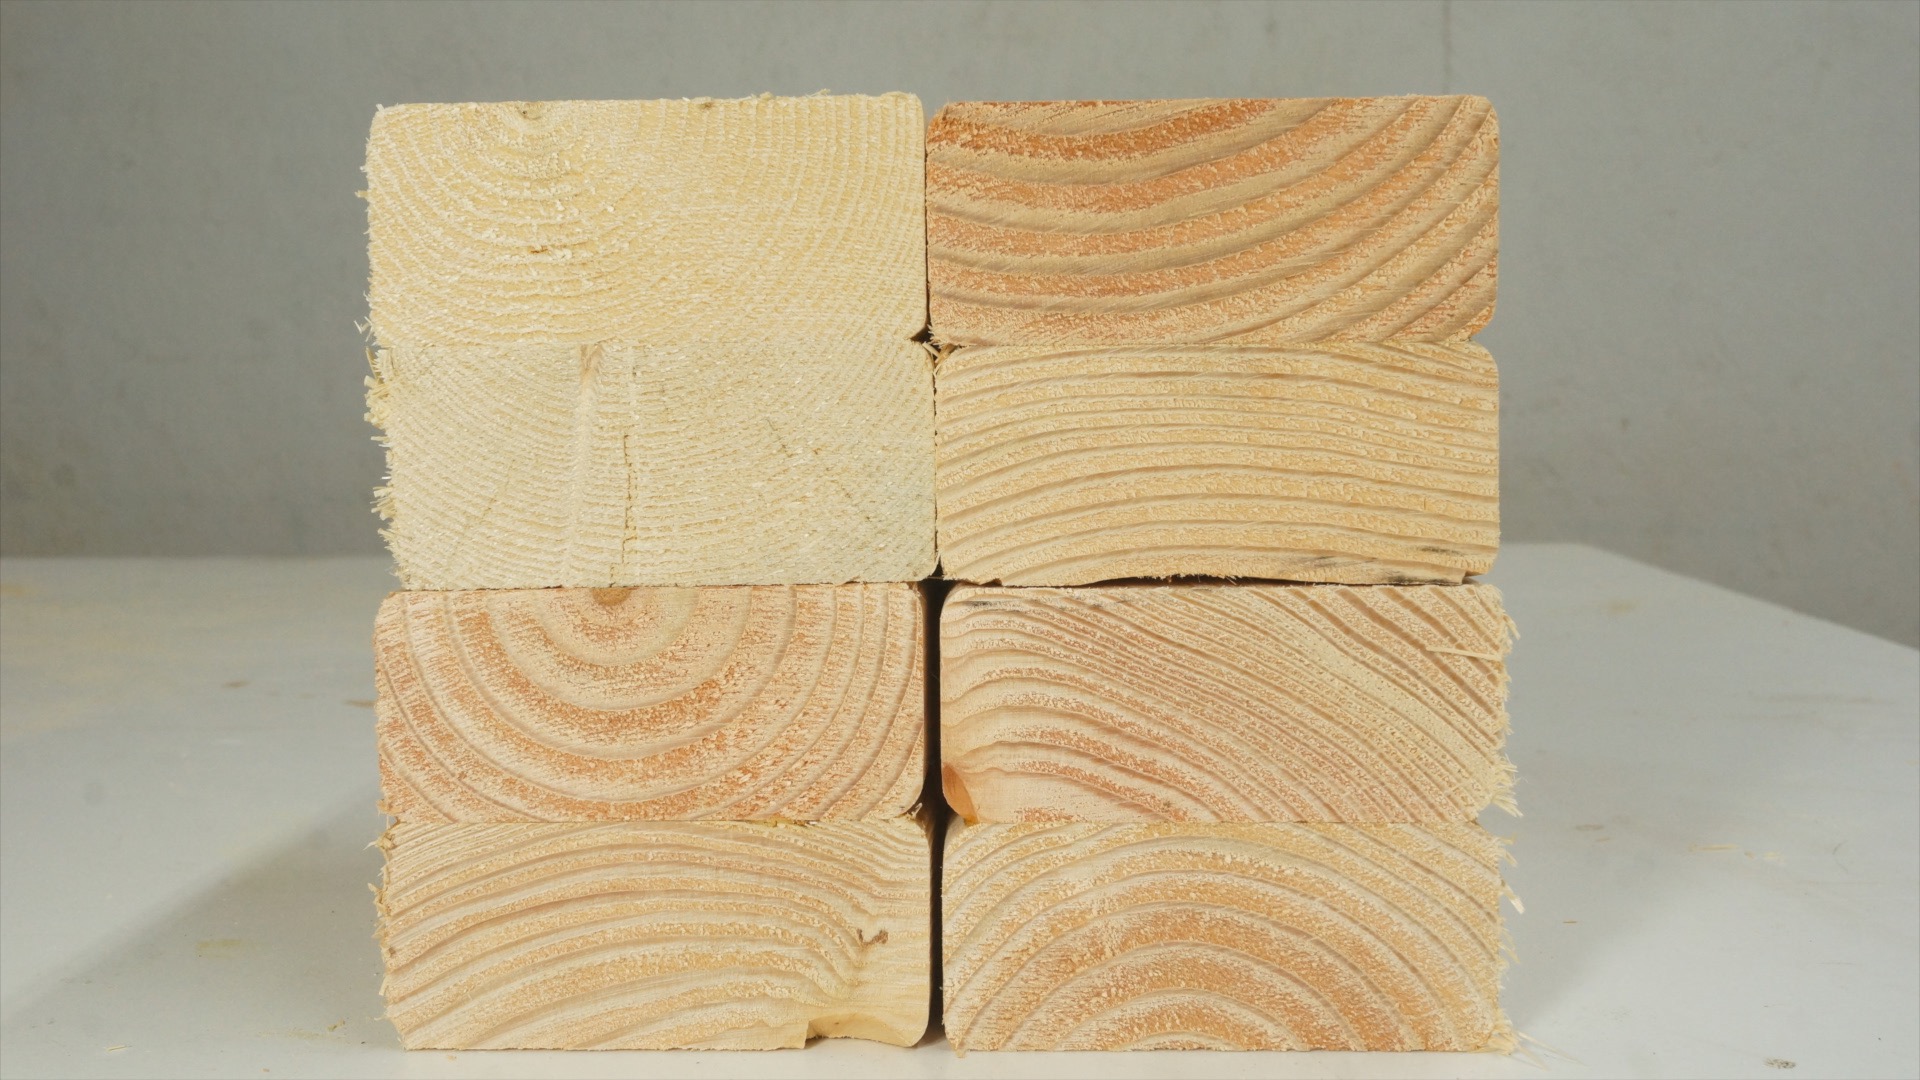
I started by finding three pairs of 4x4's. I did my best to find straight boards that had grain that matched as much as possible.
STEP TWO: JOIN THE 4X4'S
Next, I ran the face of the 4x4's that I'd join together through the planer, as well as the faces opposite that.

Then, I used dowels to help line everything up when the boards were glued up.


Once the glue dried, I ran the other two faces (top and bottom) through the planer.

STEP THREE: CUT THE BEAMS TO LENGTH
Next, I cut the beams to length. dimensions are at the beginning of the article in case you missed it.

STEP FOUR: DOWELS AND POCKET HOLES
I'm adding dowels where the beams meet as well. I'm not glueing them in, they're there more for lining everything up when the bed is taken apart and put together.


On the underside of the beams, I added hidden pocket holes and screws. This is what is holding a lot of the bed together, along with the 2x4 stretchers that will be added later. My pocket hole jig isn't necessarily made for drilling into anything larger that 1.5", here's a link to the video that explained how to get around that: https://www.youtube.com/watch?v=A3EERGjCufY

STEP FIVE: RABBETING THE SIDE BEAMS
I used the table saw to create a slot, or rabbet, for the 2x4 stretchers to lie in.


Something I didn't think about when I cut the grooves is that the stretcher will need to be able to screw into the beam with pocket screws. I fixed this by cutting a scrap piece to fit.

STEP SIX: START SCREWING!
With all the beams cut, I put the basic frame of the bed together.
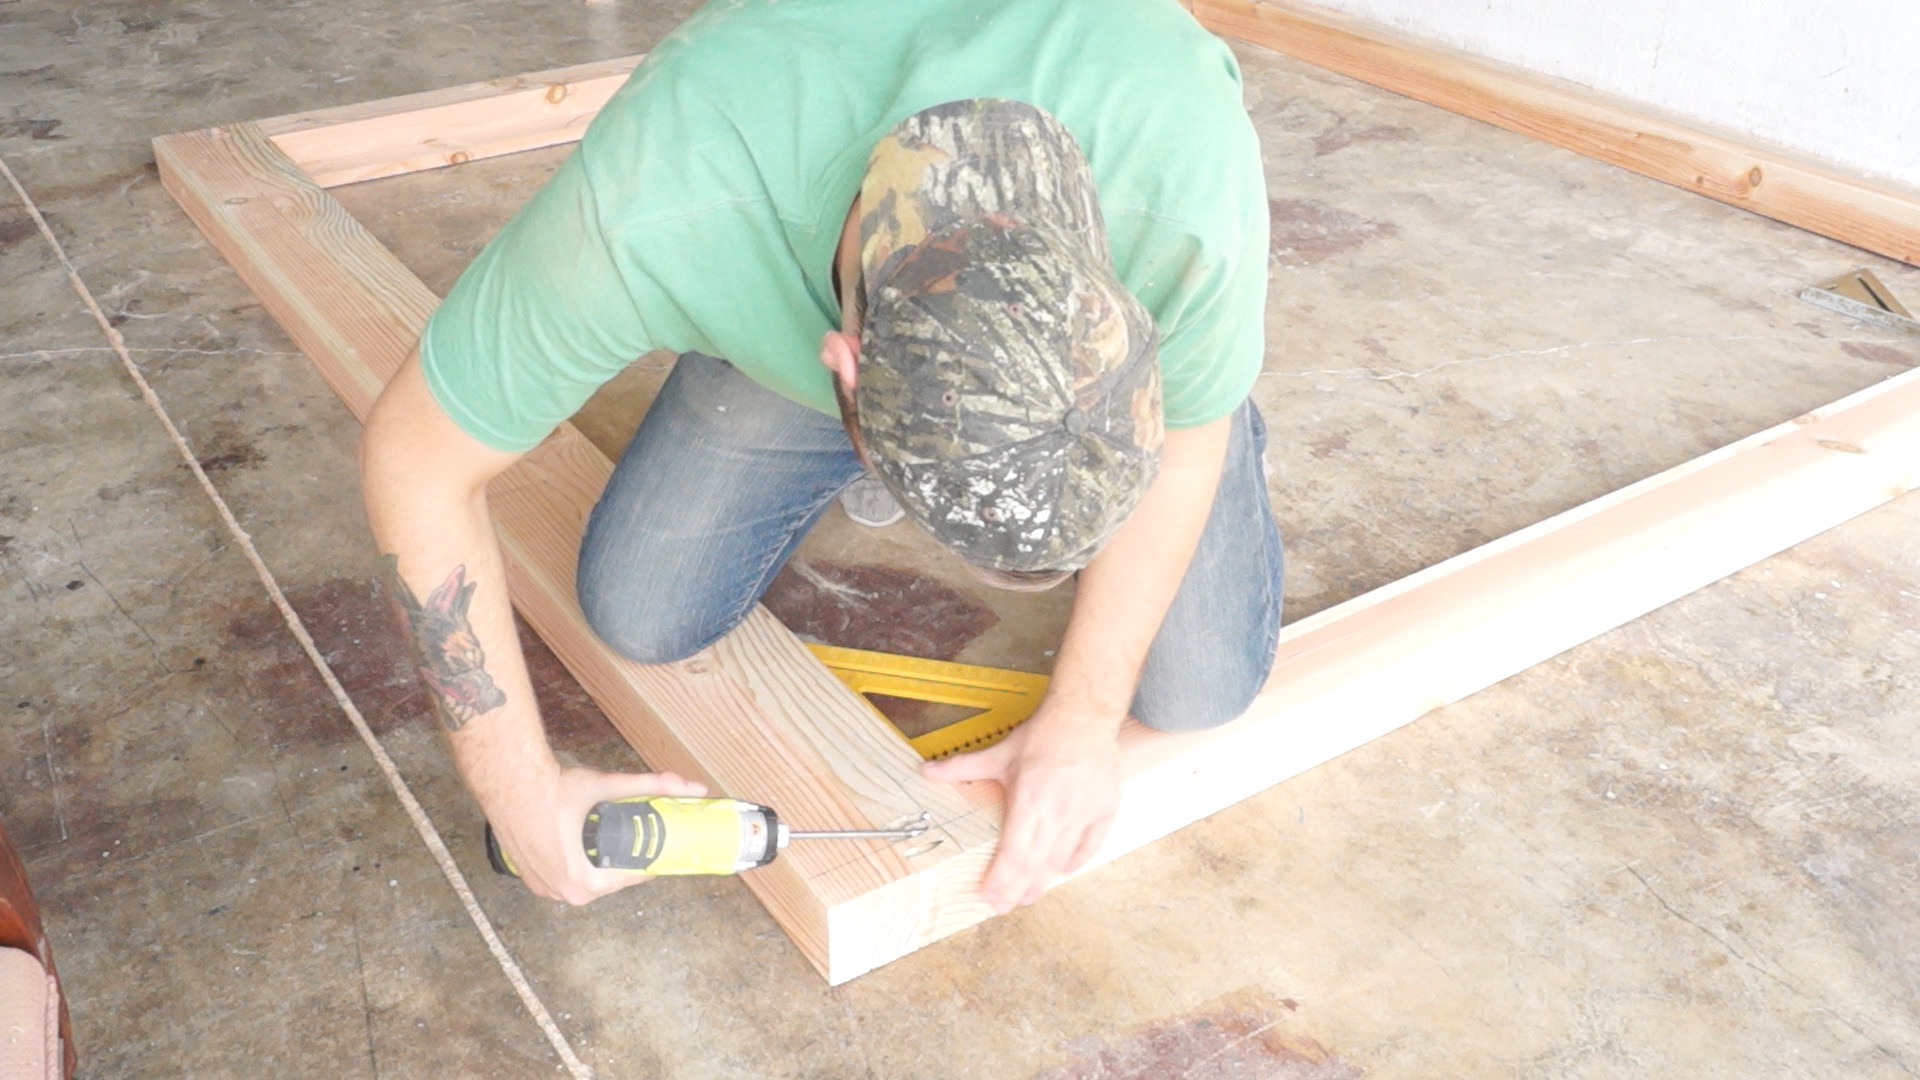
Next, I cut 10 2x4 slats to fit across the frame. I attached them with pocket screws as well. This gave the screws more meat to bite into rather than drilling straight up into the 3/4" piece above the 2x4's.


I added two more 2x4's the opposite direction to add more support.

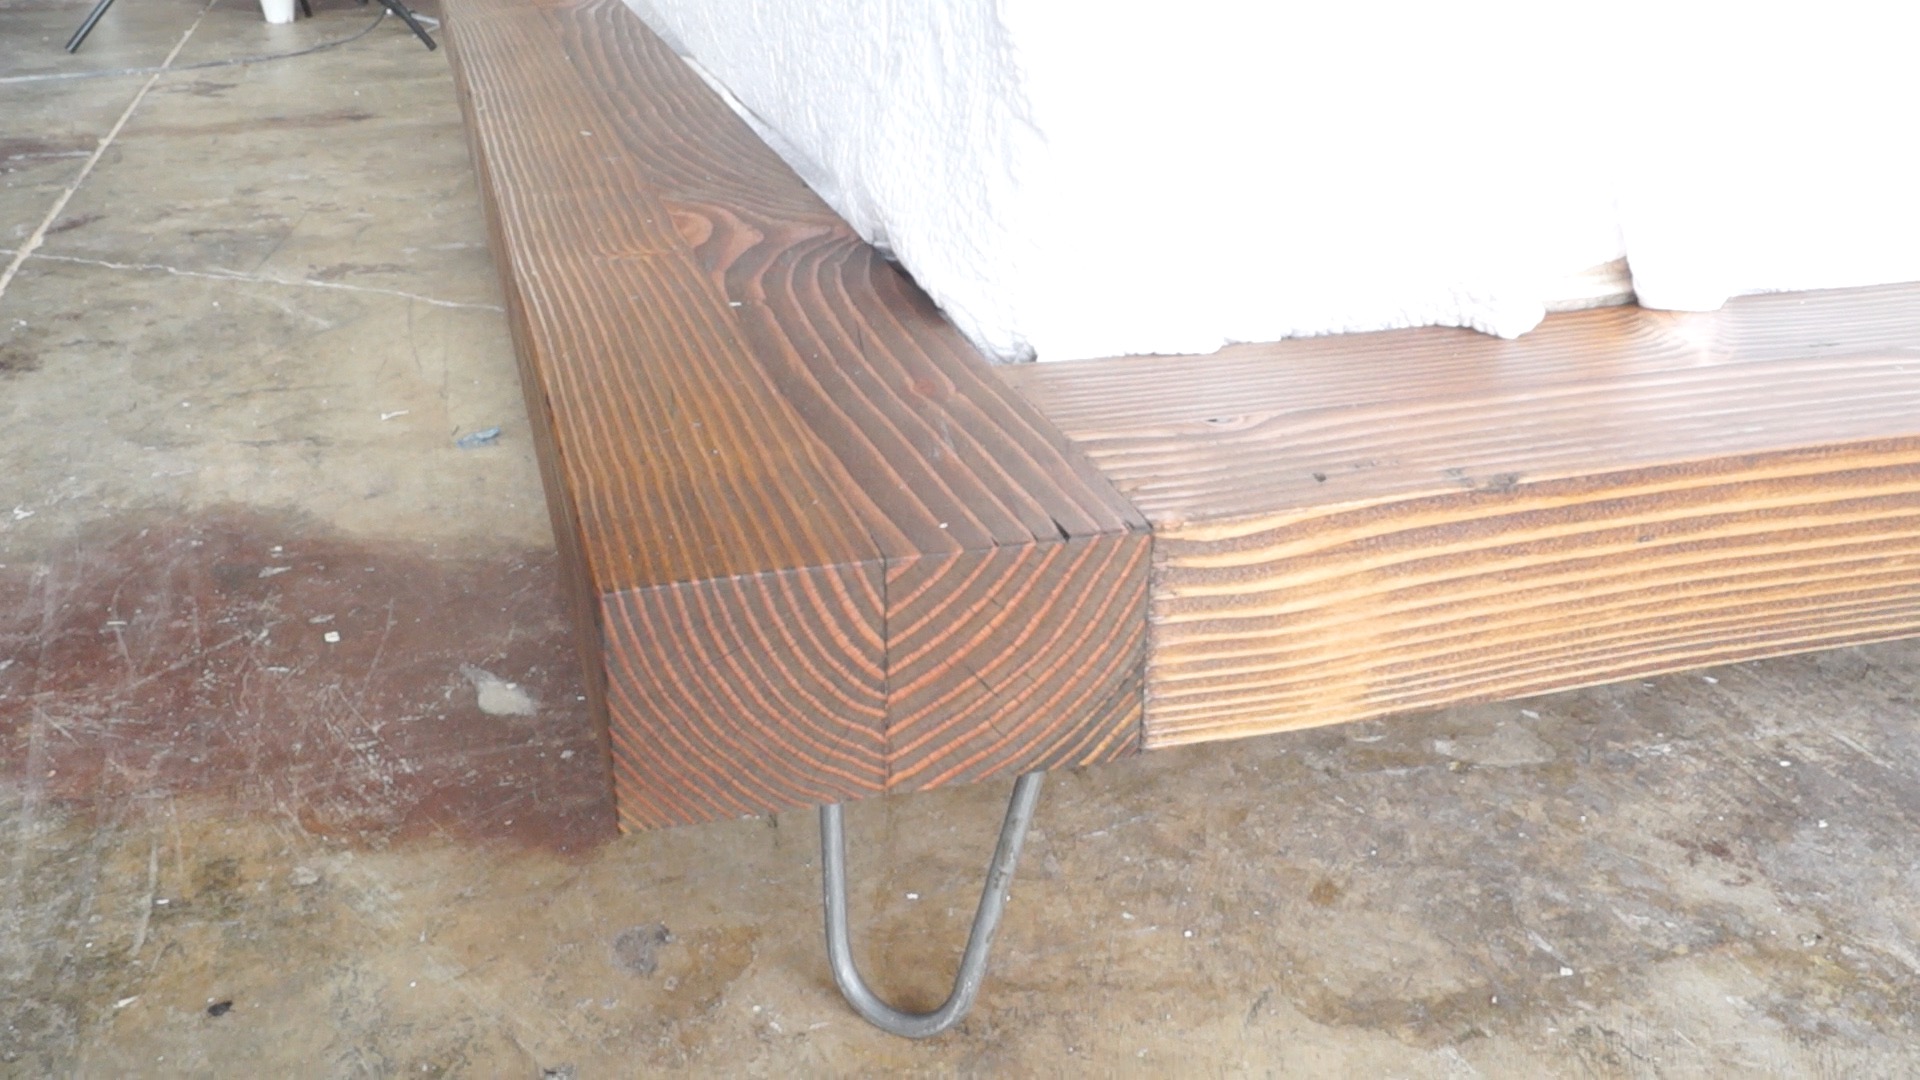
STEP SEVEN: ATTACH THE LEGS
Next, I attached the 6" Raw Steel Haipin Leg set from Industrial By Design. I measured 3.5" in from each edge of the corner to line the legs up.

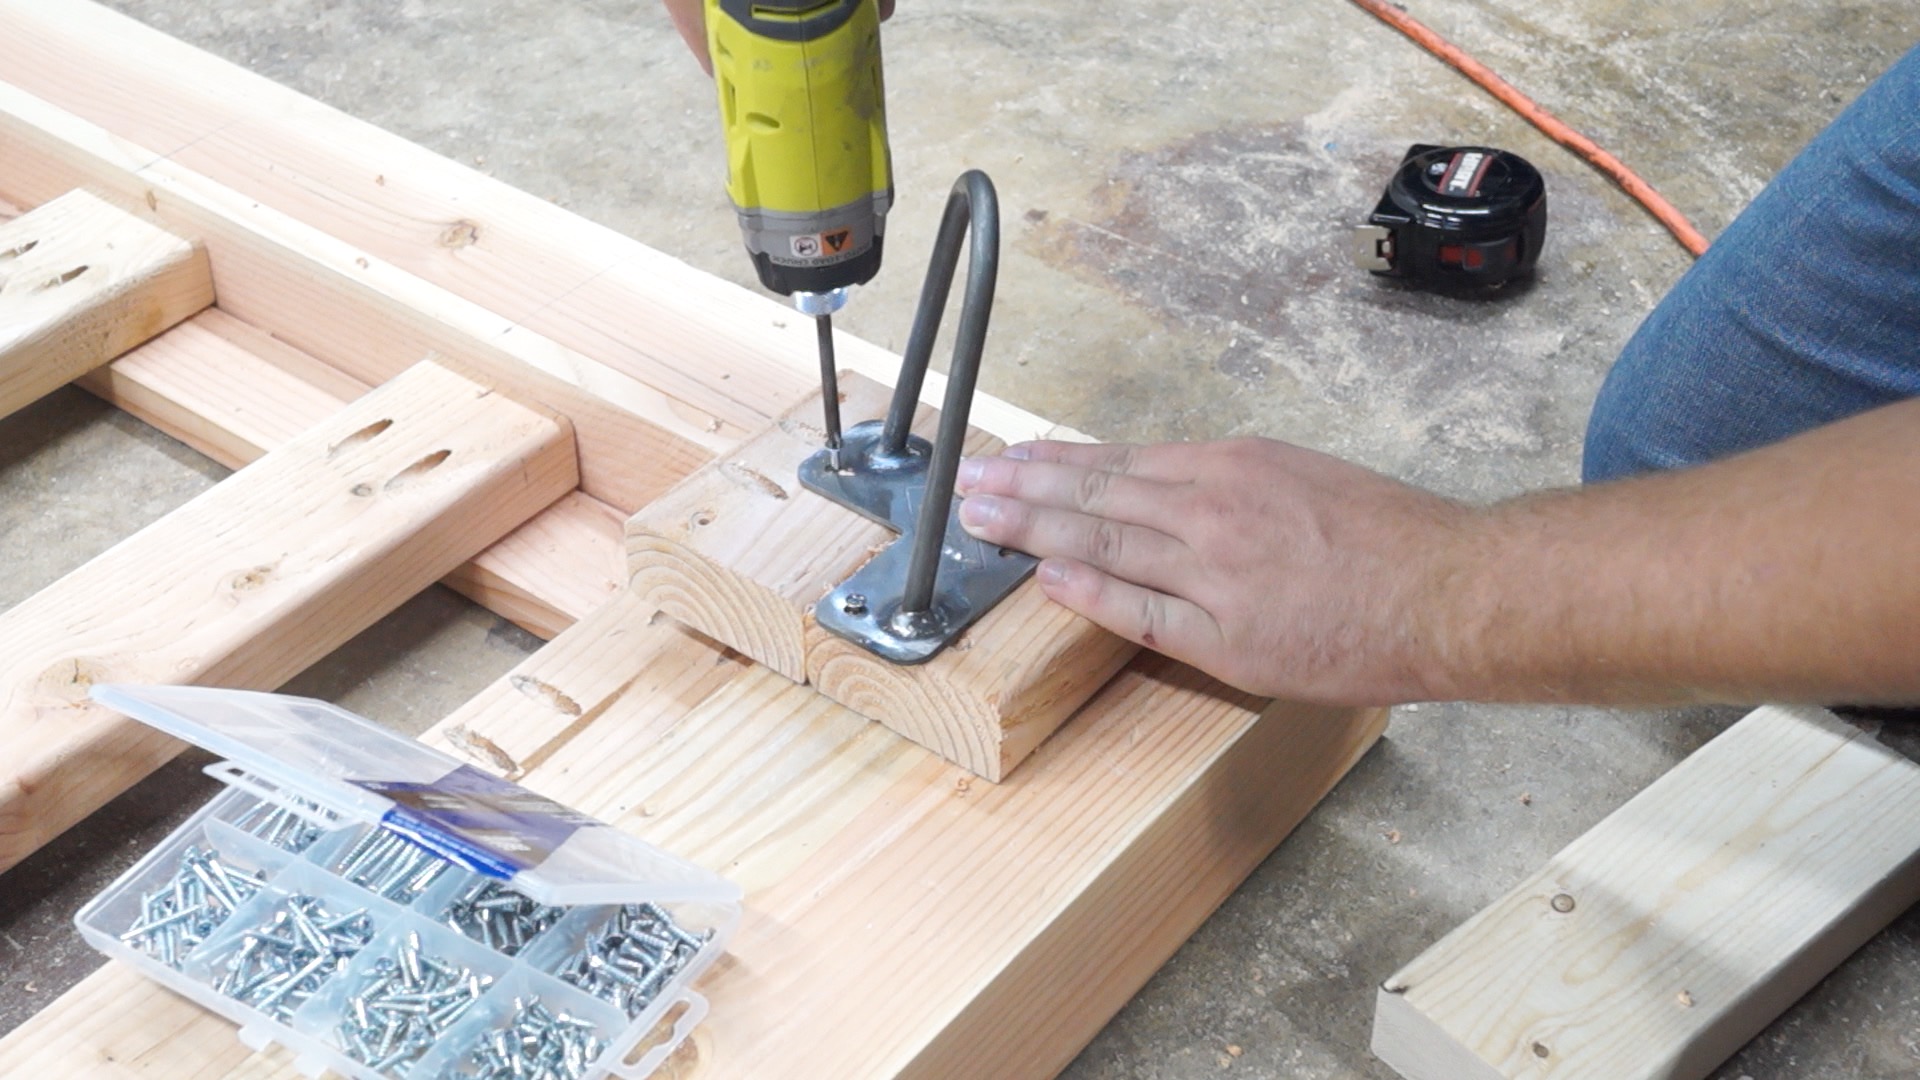
I attached the legs on simple 2x4 riser blocks. The client wanted the bed to be slightly hight off the ground. Totally optional. I used scrap 1x4 pieces (actually 3/4" thick) anywhere the riser block overhang the beams.

STEP EIGHT: CUT THE BACK BRACE
The top of the back brace needed to be flush with the 2x4 supports. I marked and the cut the brace on the table saw.


STEP NINE: CUT THE HEADBOARD
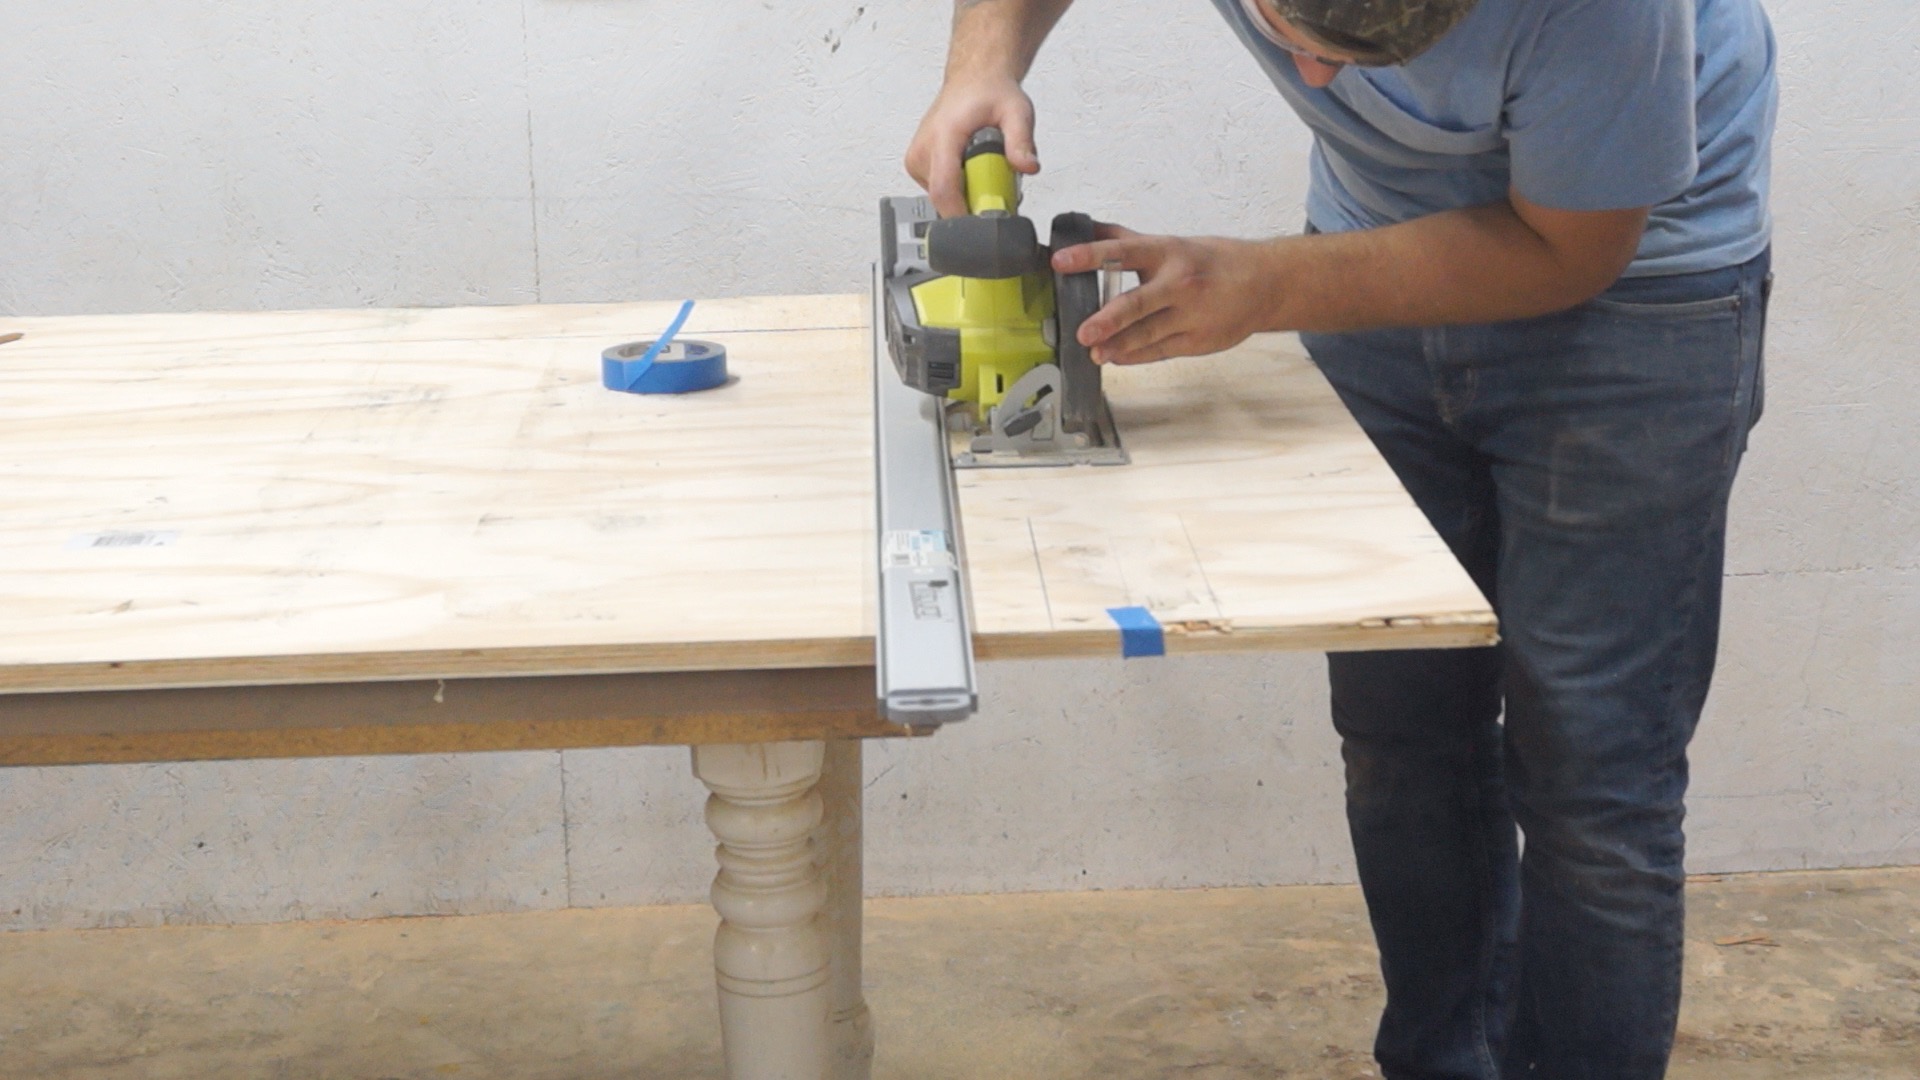
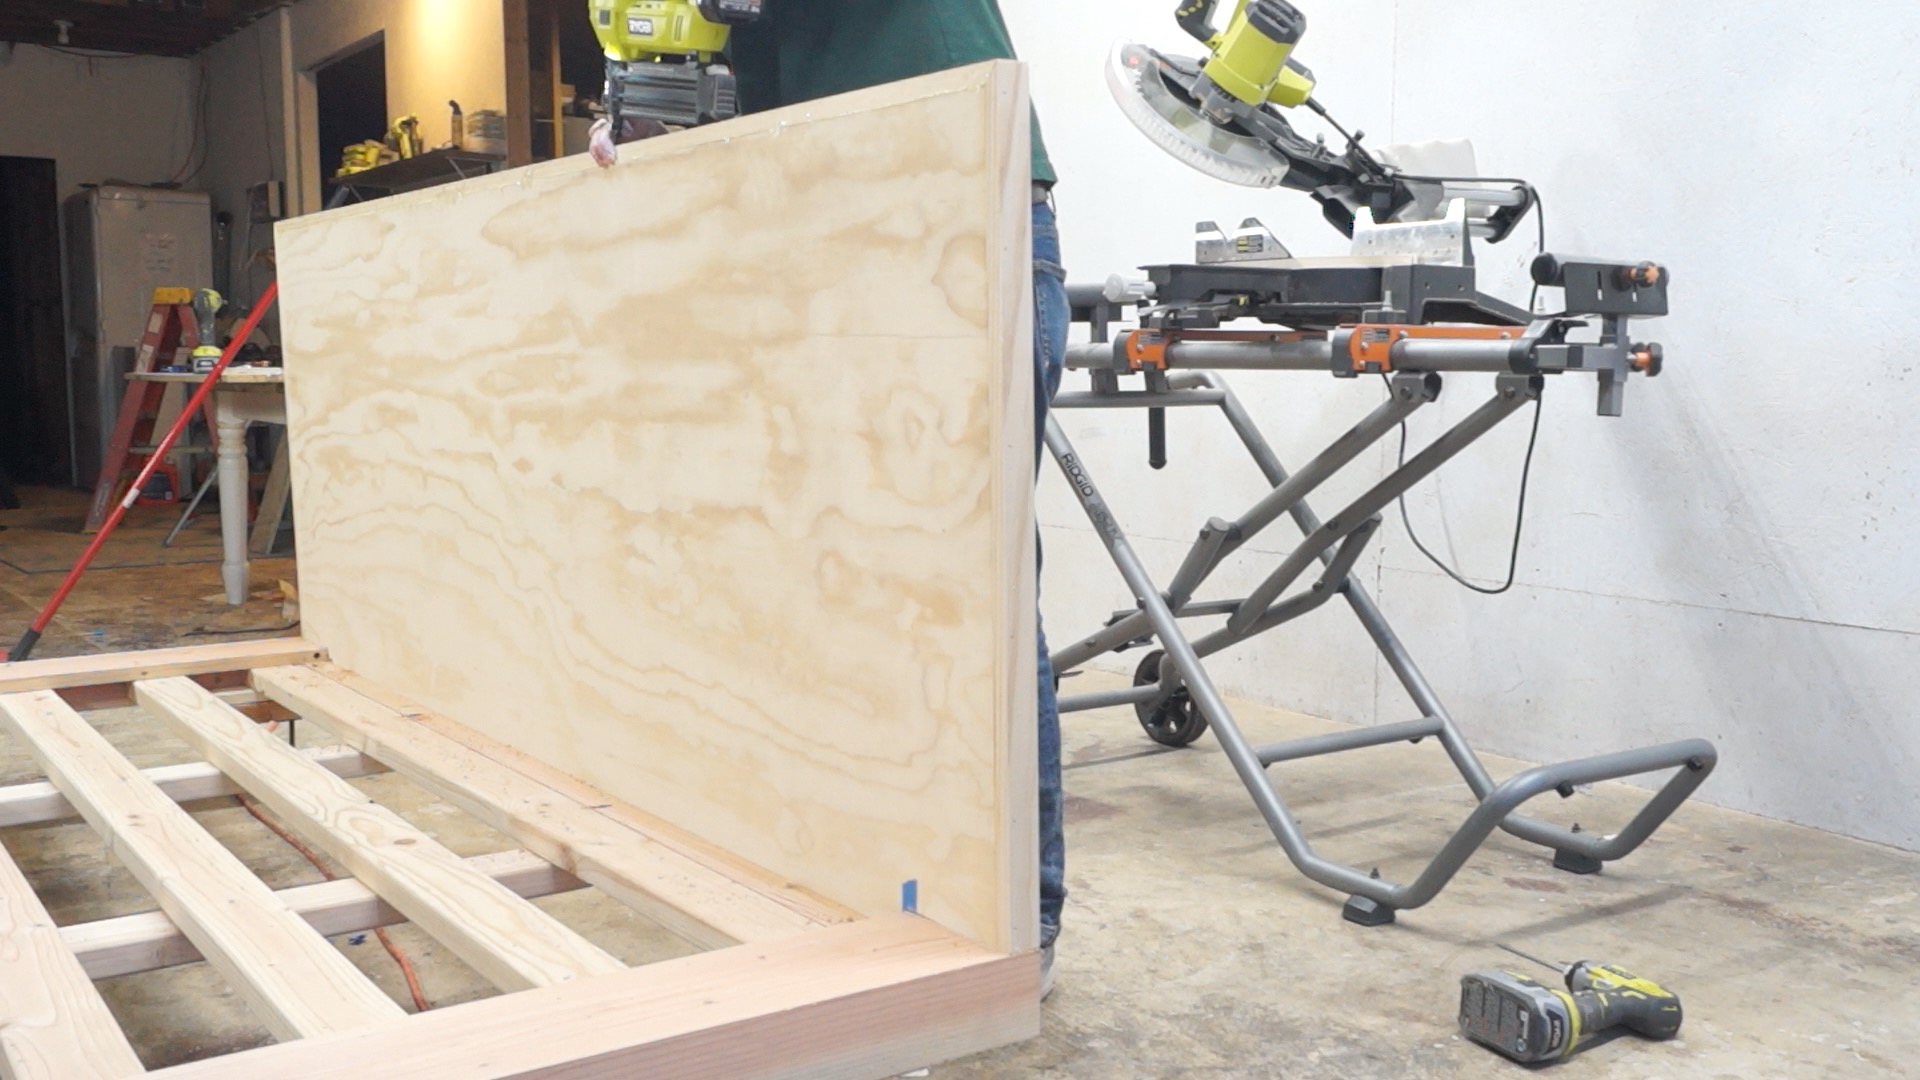
Next I cut the headboard to length and Height with the circular saw. Any time you cut plywood with the circular saw, make sure you use a straight edge and the nice face is facing down.

I used the jigsaw to cut notches in the bottom corners of the plywood to fit around the beams.


STEP TEN: MORE HEADBOARDING
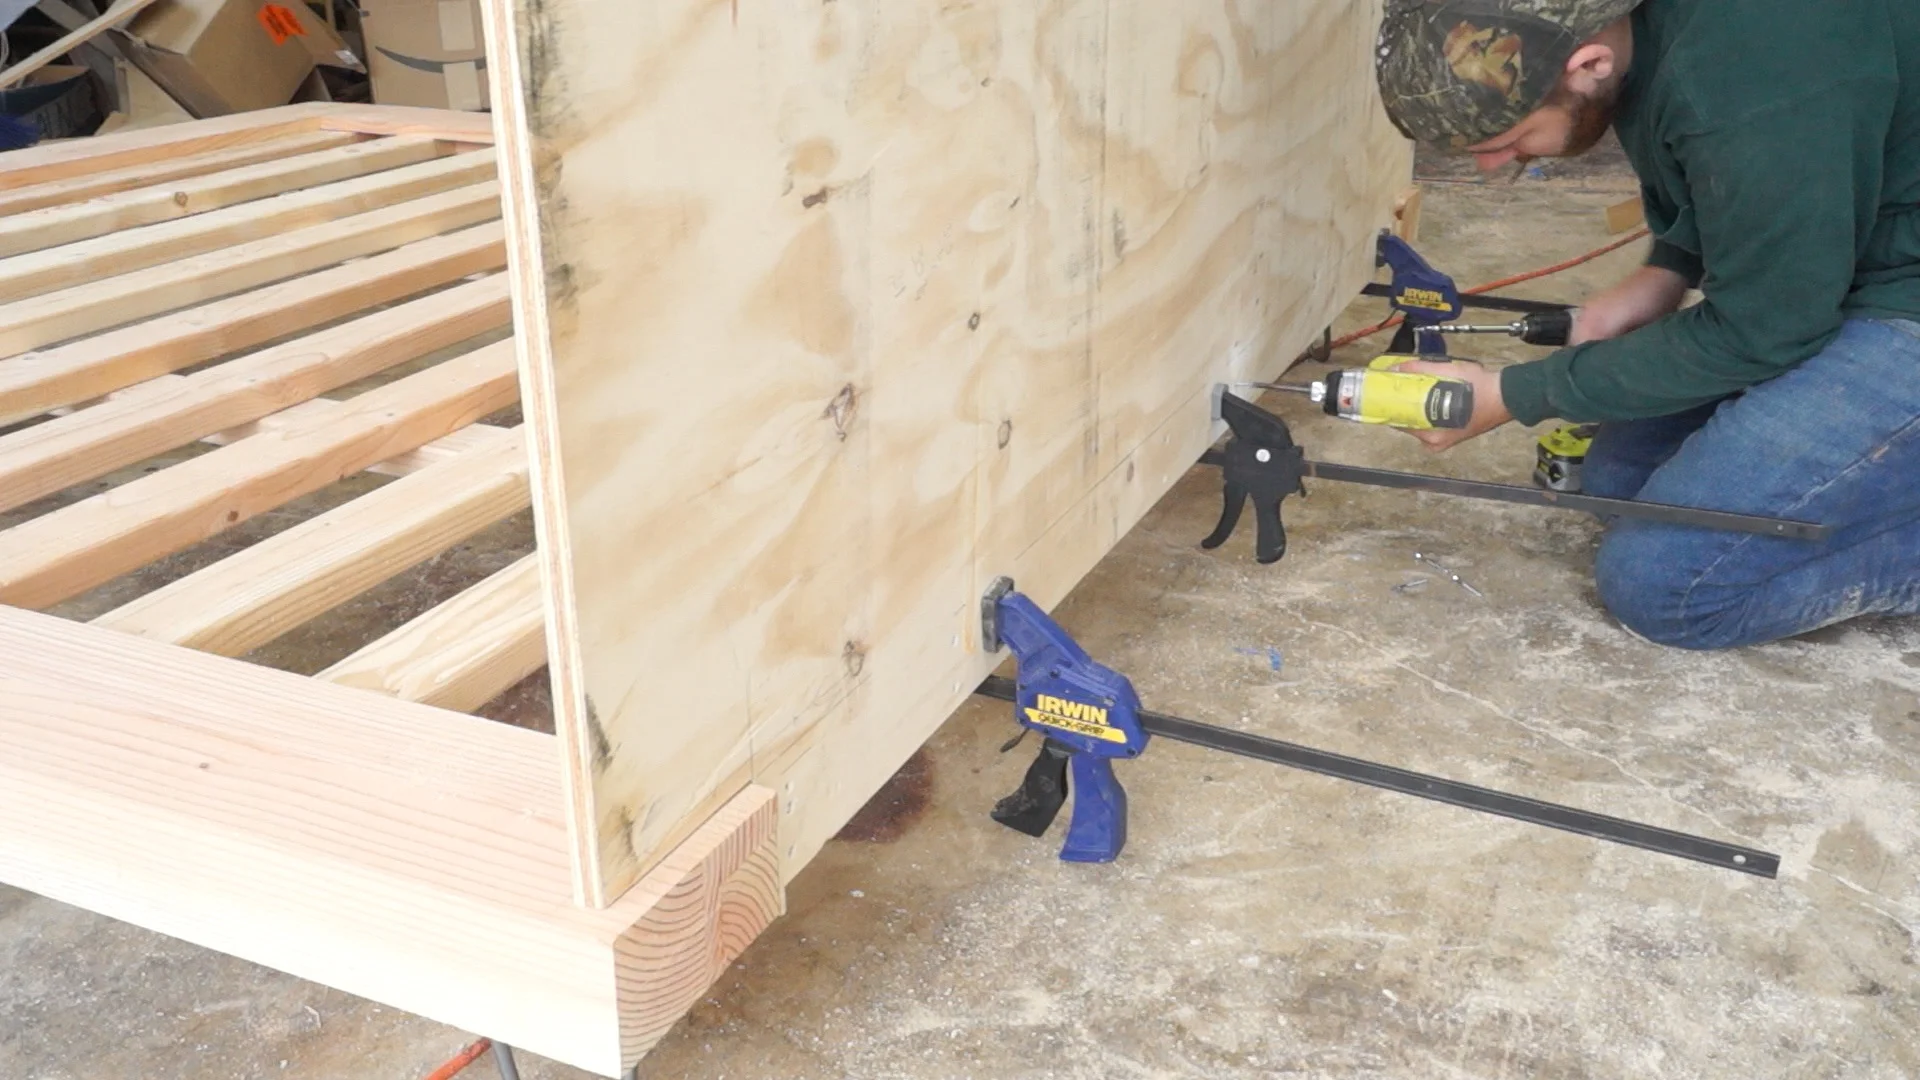
Next, I screwed in the headboard with 2" screws. I also added some pocket screws to anchor the headboard to the side beams.
STEP ELEVEN: TRIM, TRIM, TRIM
I used select pine 1x2's to trim the headboard with mitered corners. No measurements, just cut to fit.

I also glued and nailed some 1x4's to the back of the headboard. This is just to add some more strength and to make it so that the headboard doesn't only hit the wall on the trim pieces.

STEP TWELVE: MORE LEGS
I glued up some scrap 2x4's together to make some simple 4x4 legs to add a bit more strength.

STEP THIRTEEN: SAND IT UP!
Next, I took the headboard back off and sanded everything up to 220 grit.

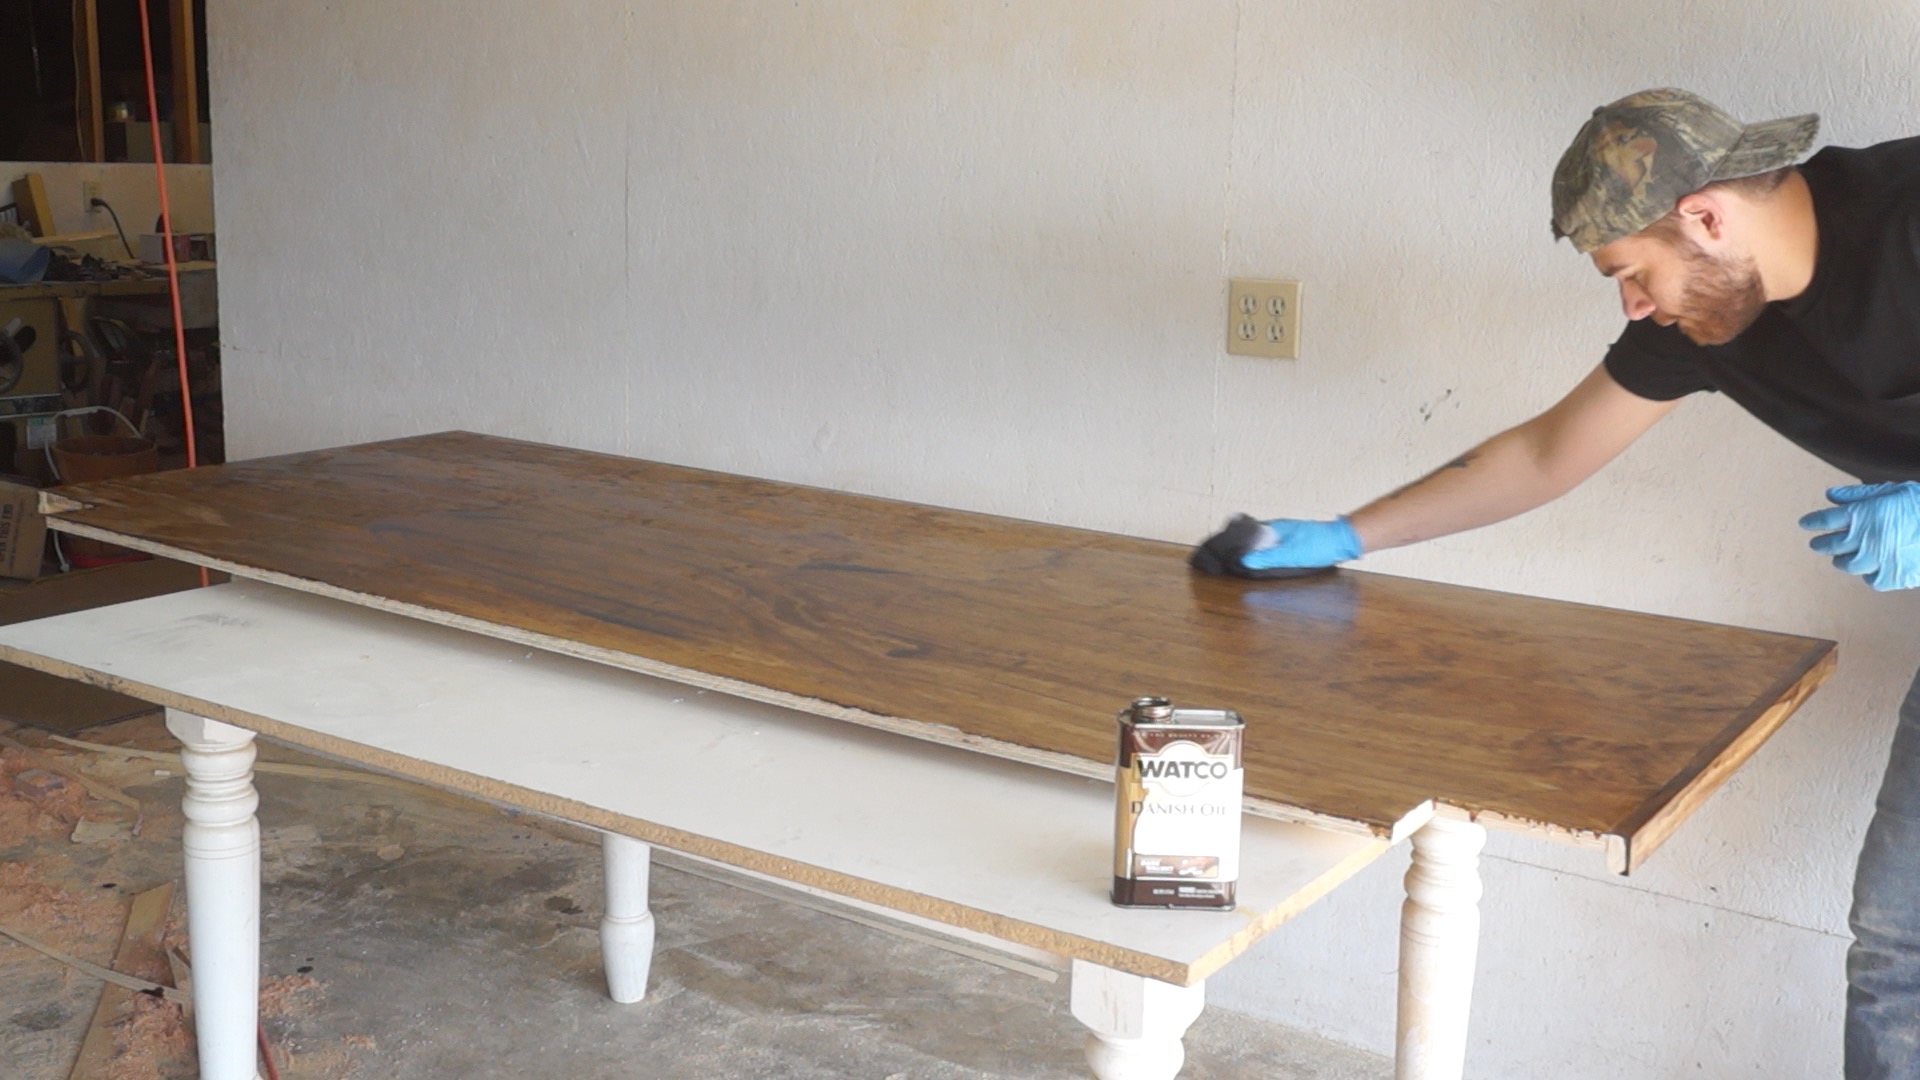
STEP FOURTEEN: STAIN IT UP!
I used dark walnut danish oil as a finish. It's quick and easy. Unfortunately, what I didn't think about is that the pink heartwood of Douglas fir takes stain differently that the other pine. If I were to build this again, I'd try and use as much of the lighter Douglas fir beams as possible.
To help the two tones match, I added 50/50 ebony stain/danish oil on the second coat of the bed beams.
I added 50/50 red toned cherry stain/danish oil on the second coat of the headboard.
STEP FIFTEEN: FINISH IT UP!
Finally, I cut some 3/16" hardboard to fit as the platform for the mattress to sit on It's not necessary, but it covers up the 2x4 stretchers that looked bad after I got danish oil on them.


That's all there is to it! I hope you enjoyed it and go out and make your own. If you do, don't forget to tag me in a picture of it!
MORE COOL PROJECTS

GET IN TOUCH